
At Cloudsmith, we are all about automation and we believe that first-class command line tooling makes up a significant part of that. With that in mind, we are continually improving the Cloudsmith Command Line Interface (CLI). This short post will guide you through installing / setting up the CLI and show you some examples of the things you can achieve with it!
Setup
The Cloudsmith CLI is built in Python atop the Cloudsmith API and as well as the API powering the CLI, we have designed the API so that it is fully compatible with Swagger and OpenAPI 2.0, allowing us to generate bindings in more or less any programming language.
If you have Python set up already, then it is super simple to install the CLI from pip using:
pip install cloudsmith-cli
This will install the Cloudsmith CLI itself and any required dependencies.
Once installed you can then configure the CLI it with:
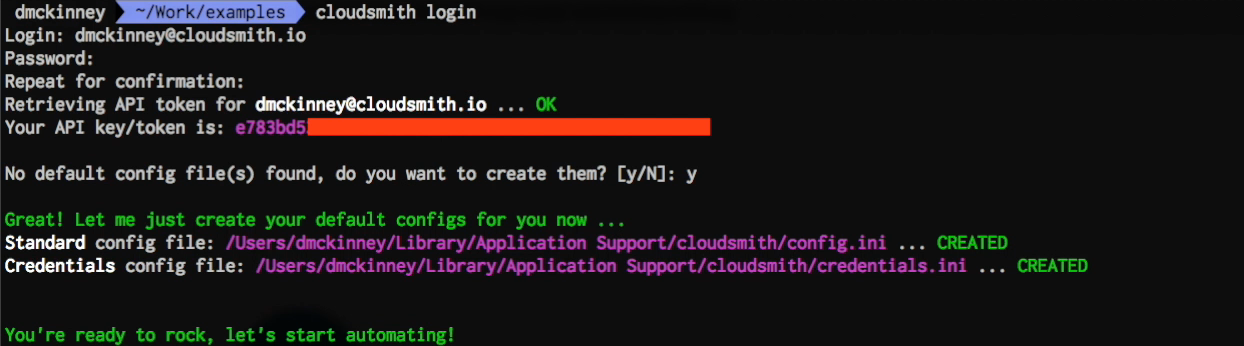
cloudsmith login
This command will prompt you for your Cloudsmith username and password, and it will then retrieve your Cloudsmith API key and set up the required configuration and credential files automatically:
To check that it was all installed and configured correctly, use the command:
cloudsmith whoami
This will return the current user that the CLI is authenticating as:

Let's try some commands!
Once you have the CLI installed and configured you can start to try out some of the operations. To get a list of the supported commands, just do:
cloudsmith
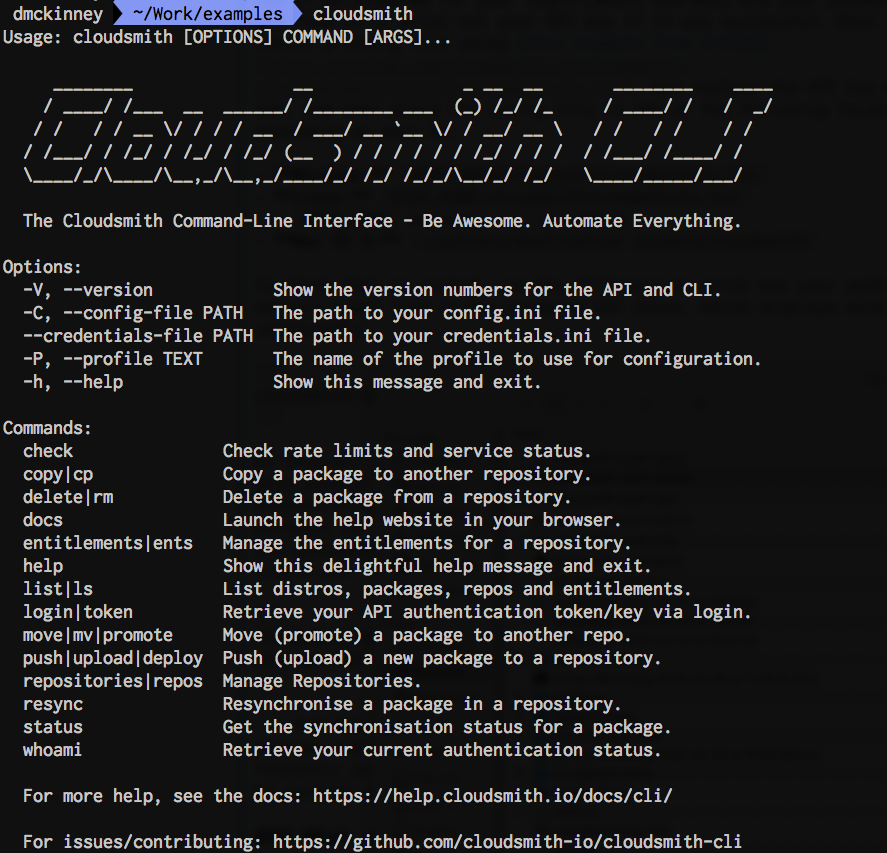
There is a LOT you (or the systems you are automating!) can do with the Cloudsmith CLI, but rather than explore every single command here how about we start with what is sure to be a very common use-case - uploading (pushing) a package.
We can see above that the command will be cloudsmith push, and you can get additional help and information on any command by using the -h flag:
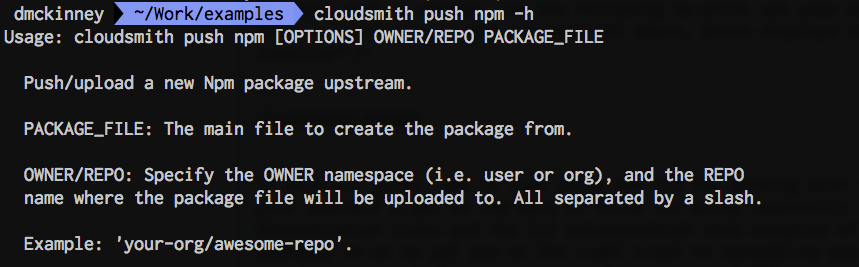
OK, that makes more sense now! So to push an npm package we need the push command, the repository owner (namespace), repository identifier, and the package file name! Easy:
cloudsmith push npm OWNER/REPO PACKAGE_FILE

Right, that works! The CLI has now uploaded the files, created the package and waited for synchronisation to complete (synchronisation is where we extract the metadata and files associated with the package, and make the package available for download).
Remembering that all Cloudsmith repositories are fully multi-format, i.e you can upload any of the package types that we support into the same repository, we can then push a Python package using the command:
cloudsmith push python OWNER/REPO PACKAGE_FILE

And to push a Cargo crate it would be:
cloudsmith push cargo OWNER/REPO PACKAGE_FILE

I'm sure you're sensing a theme here... :-) . Some other formats (such as Debian or Maven) have additional requirements that change the command used, but help is always available using the -h flag.
The point is, it's simple, quick and easy! The whole idea of the Cloudsmith CLI is to enable your automation, not get in your way. It supposed to make your life using Cloudsmith easier!
Some other commands!
So what else can we do with the Cloudsmith CLI. Well, lots of things! Let's start by seeing how we can list the contents of a repository. To do this we use the command:
cloudsmith list pkgs OWNER/REPO
Like so:

Again, it's Easy! It will probably come as no surprise at all at this point that the command to get a list of all repositories for an account is just:
cloudsmith list repos OWNER
And similarily, the command to retreive a list of all the Entitlement Tokens created in a repository is simply:
cloudsmith list ents OWNER/REPO
We've also got the following resources to help you:
- CLI Documentation, for additional help.
- CLI GitHub Repository, to see how it is built.
- CLI Cloudsmith Repository, for pre-releases of the CLI.
Finally, we wish you well on your path to better software and better DevOps. Remember - Be Awesome, Automate Everything.