
TL;DR: We released Phase 1 of our API+CLI, marking a milestone in which we can support end-to-end packaging, from uploading artifacts, to inspecting/managing artifacts, to entitling, downloading and installing artifacts. Get it from pip today: pip install cloudsmith-cli and get automating with Cloudsmith.
Warning! Mild tangent incoming:
"Now witness the power of this fully operational battle station ..."
The quote above, as some of you will undoubtedly know, is from Return of the Jedi, the third film of the original Star Wars trilogy. Not those parodies that they made that someone claimed were prequels, ugh. It's a moment in which the rather evil Emperor Palpatine wants to show that the newly rebuilt Death Star is, despite appearances, very much ready to live up to its name. He then proceeded to have the Death Star blow up a gigantic cruiser ship just to prove the point. What a guy. If you can't visualise it, we've got a GIF as per usual to save the day, probably (insert pew pew pew here):

What's this got to do with Cloudsmith?
Well, today we finally released Phase 1 of the Cloudsmith Command-Line Interface (CLI, for those in the know), powered by the Cloudsmith RESTful API. The reason for the Death Star analogy is that originally we had planned to only release Phase 1 of the API+CLI to those who had opted-in, but the work that we've put into it has resulted in something altogether more functional and dare we say, fully operational. Rather like the Death Star itself.
I'll just side-step the fact that the rebels do (spoiler alert) actually still blow it up, and this variant of the Death Star seemed even less effectual than the first one. Probably because it was still a Phase 1 Beta, cough. The same caveats apply to the API+CLI though - This is considered an early access release, and although we've conducted a swath of panel beating internally, there is still plenty to do to make it better. We'd love to hear your feedback, but please avoid targeting our exhaust ports before our shields are ready. :-)
In addition to the API powering the CLI, we have designed the API so that it is fully compatible with Swagger and OpenAPI 2.0, allowing us to generate bindings in more or less any programming language in existence. If you're not familiar with the concept of discoverable APIs, it is a concept in which the API is self-describing. It enables users or machines to discover what the inputs, processing and outputs of the API are prior to integration, enabling such delights as the capability to programmatically generate libraries for the API, such as with Swagger Codegen.
It certainly pushes us towards our goal to Automate Everything.
Enough blabbing, give me the deets!
Understood, sir ... Sorry, not sorry, sir!
We'll start with the CLI, since it'll be that which will be more interesting for those of you looking to integrate Cloudsmith into your CI/CD processes for automating artifact packaging, and getting your code into the right environment as quickly as possible. We went for Python as the language for this, since it's what we're most familiar with, it uses the generated Python API bindings (also available for anyone else), and is open-source (licensed as Apache 2.0). It enables all sorts of awesome, with more to come soon, including:
- Uploading Debian, RedHat, Maven, Python, Ruby or Raw (Generic) packages, programmatic and completely automated, including waiting on synchronisation.
- Token-based authentication, so bot/scripting friendly.
- Operations such as retrieval and deletion for packages.
- Supports argument-based, environment-based or file-based configuration management, for flexibility.
For Phase 2/3 we'd like to build the following into the CLI:
- Extended validation, to save time on error conditions with better pre-upload/pre-flight checks.
- Additional output formats, such as JSON, to help facilitate integration into your own scripting.
- Entitlement code management, to help with users who build billing or granular access controls around their deployments.
- Package moving/transfers, for automating pipeline promotion (e.g. promote from staging to production).
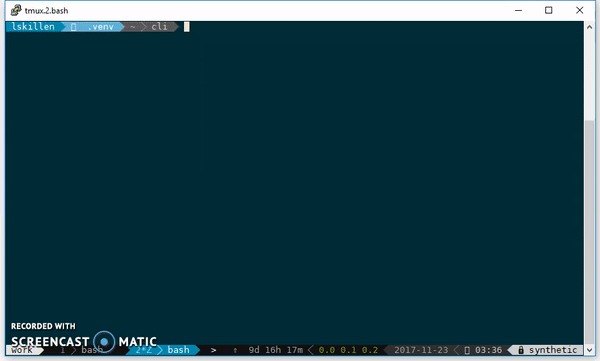
Here's a GIF snippet of the CLI Demonstration Video below. The GIF only shows the first 10 seconds, but you can see that it's a fully-fledged CLI tool, with colours and everything. :-) The full video demonstrates package uploading.
We've also got the following resources to help you:
- CLI Documentation, for additional help.
- CLI GitHub Repository, to see how it is built.
- CLI Cloudsmith Repository, for pre-releases of the CLI.
I think the following sums it up:

Up and running with the CLI in 60 seconds
You can skip this bit if you're not setting up the CLI.
You can install the CLI straight from the command-line using pip (because it's available on PyPi):
pip install cloudsmith-cli
To get setup you'll need to retrieve your API key/token from the Cloudsmith service and store it somewhere. You can do this directly via the CLI itself, using:
cloudsmith token
You'll be prompted for your login (email address) and your password (twice), and then it'll print out your API key if it was successful. When you have it create a config file using this example from GitHub, but replace the API key with your own, and then place the config file in one of the following locations depending on your OS:
- Windows:
%APP_DATA/cloudsmith/credentials.ini - Linux:
$XDG_HOME/cloudsmith/credentials.ini$XDG_HOMEdefaults to~/.config.
- Mac OS X:
~/Library/Application Support/cloudsmith
To check that it worked, run the following to print out your authentication details (just like in the animated GIF above, which displays mine, no stealing!):
cloudsmith whoami
If this all works, you've just setup the CLI for working with Cloudsmith, so give yourself a pat on the back or three for being especially fantastic. The demonstration video and the CLI documentation show examples of how to push packages to us to get you on the right track to automating your development and deployment pipelines. To get an idea though, it'll be something as simple as:
cloudsmith push deb your-org/your-repo/ubuntu/xenial your-awesome-package.deb
... And you're done! The CLI will now upload your files, create the package and wait for synchronisation. Automatically. May I just say what a fantastic package your-awesome-package.deb is? Kudos to you on your choice of package naming. Moving on!
What about that sweet, sweet, API?
Yes, sweet, it is!
As previously mentioned we're very proud to have a RESTful API that is completely built with Swagger and OpenAPI 2.0 support. The benefits to you as a developer, integrator, or systems admin, or any other related role, is that you can:
- Explore and utilise the API via the Swagger UI.
- See how the API works in detail prior to integration.
- Use it to build your own integrations directly.
You can play and explore about it at the following places:
- API Swagger UI, for the discoverable bit we mentioned.
- API Reference Documentation, which is fairly extensive.
- API GitHub Repository, to see our language bindings.
Note: If you're logged in on the main website, you'll be logged in on the API Sandbox as well. This allows you to play about the the API as an authenticated user to see what it does, although please be aware that any operations do indeed affect your account.
Did you say bacon, err, Maven ... and Jenkins?
"Did you say bacon? The maple kind" ...

Yup. You heard right. Along with Phase 2/3 of the API+CLI we're also working on a Jenkins integration and a Maven Wagon integration, at the same time. We too like to live dangerously.
The Jenkins integration will allow you to more smoothly integrate Cloudsmith into your CI/CD plugin by offering a Pipeline-compatible (i.e. Jenkins 2.0) interface into our service. We utilise Jenkins for own our automation and pipelines internally, and think this will be awesome. We've also got other CI/CD services such as Travis, Circle and AppVeyor on our roadmap too. Watch this space.
The Maven Wagon integration will allow you to deploy artifacts from Maven builds transparently and automatically into Cloudsmith, which bypasses the need to write a wrapper using the CLI. Both are great, of course, but we know that Maven users are desperately looking to reduce complexity in any way possible. If you're not sick of looking at XML, we can only bow before you in awe.
That's A Wrap!
You can see the release notes for 0.20 in which we introduced Phase 1 of the API and CLI. Obviously the API/CLI took the predominent amount of work in the past bucket or two, but there are other goodies in there, such as adding in links to associated package versions, and we improved the generosity of the free/small tiers. Three cheers for better tiers!
As usual keep an eye out on the official Cloudsmith Development Roadmap to see how we're getting on, what's coming up next, and what's coming up in the near future. If there's something particularly awesome that you'd like to see sooner, please vote on it to help us prioritise it.
"Now witness the power of this fully operational ... Command-Line Interface."
Said no-one ever, but the sentiment is there. It's out, and it's more functional than we originally scoped for. We'd also like to think of our API+CLI as being like the Death Star that defeated the rebels. It'll bring a whole new level to our service, and as we continue to build on it, it'll open up the realm of possibilities with what you can achieve with Cloudsmith.
Remember, install it now with pip install cloudsmith and join us on the quest to Automate Everything.
So what are you waiting for? Get automating with Cloudsmith!
Until next time, stay awesome!